Cursor vs Claude Code for Frontend: Choose by Feedback Loop
- AI Coding Tools
- Guides
- Cursor
- Claude Code
- Frontend
- Written by
- Bhargav Tibadiya
- Published
- Reading time
- 9 min read
For frontend work, I would trial Cursor first when most requests are visual: move this control, match that spacing, fix a crowded card. Its Design Mode lets you annotate the running app and sends the agent element details plus a screenshot[1]. I would evaluate Claude Code when the task starts with a repository-level change and needs an explicit implementation and browser-review loop.
Neither choice means giving up visual verification. Cursor documents a native browser with screenshots, console output and other controls[2]. Claude Code documents Chrome integration and a Desktop preview workflow[3][4]. The old shorthand that one tool sees the UI while the other only sees source code is too crude for a current comparison.
This guide compares documented workflows checked on November 7, 2026. I did not run a head-to-head test, measure speed or score generated interfaces. The proposed tasks and acceptance checks below are a way to evaluate the tools, not a report that either one passed them.
Start with the feedback loop you need
Frontend work contains different jobs. A spacing correction is not the same as extracting a reusable component or changing how a route fetches data. If you mix those jobs into one prompt, it becomes hard to tell whether the assistant misunderstood the design or the architecture.
My first decision would be where the task's clearest evidence lives. If it is a screenshot and one visible element, start with a visual note. If it is a failing test or an inconsistent component API across several routes, start with a bounded repository plan. Then require a rendered check before accepting changes that affect the interface.
This is a recommendation about collaboration. It is not a claim that Cursor cannot refactor a repository or Claude Code cannot adjust CSS. Both have documented browser-related workflows[2][3][4]. The difference you should test is how clearly each workflow carries your intent into code and back into inspectable evidence.
Cursor: point at the app instead of describing coordinates
Cursor's Design Mode lets you select one or more elements, mark an area, edit text in place and add CSS-property changes to a note. Each note includes selected-element details and a cropped screenshot. For React, Vue and Svelte apps, the documented context can include the component name and stack[1].
That is a good fit for a request like "make this filter row align with the cards below." The visible relationship is the important input. Pointing at both regions can be clearer than guessing which wrapper component controls their spacing.
The current guide places Annotate in the browser inside the Agents Window. It says the Annotate interface is available in Cursor 3.24.18 or later; earlier versions use a pen icon labeled Design Mode[1]. Check your version before assuming a tutorial's button labels will match.
I would begin with one note and inspect the resulting diff. A visual change can be implemented through a local class, a shared token or a component-wide rule. The screenshot tells you whether the target looks right; the code review tells you whether the fix accidentally changes every other card.
Cursor's browser is more than a screenshot viewer
Cursor documents navigation, clicking, typing, scrolling, screenshots, console output and network inspection in its browser workflow. The guide says the browser does not require an external tool installation, and notes that network-traffic visibility is currently limited to the Agent panel[2].
Those capabilities can support a useful iteration: open the local app, reproduce a failure, inspect the error and then verify a correction. They do not prove the assistant inspected the right state or every viewport. "Tested in the browser" is too vague to be an acceptance record.
Ask which route was opened, what interaction was performed and what evidence was captured. A screenshot of a form before submission does not verify its error state. A successful navigation to the homepage does not verify a nested route with real content.
The browser guide also says workspace browser state persists, including cookies and local storage[2]. Use an appropriate development account and know which environment you are opening. A local code task should not quietly become a mutation in a live customer account.
Claude Code: verify the browser route your setup supports
Claude Code's Chrome integration connects the CLI or VS Code extension to the Claude in Chrome extension. Its documented uses include reading console errors, checking designs and exercising web-app flows[3].
The prerequisites matter. The guide requires a supported Chromium-based browser, the extension at version 1.0.36 or later, Claude Code and a direct Anthropic paid plan. It requires `/login` authentication; an API key or a long-lived setup token does not enable this integration. The documented Chrome integration is not supported inside WSL[3].
Those restrictions belong to this integration, not to every possible way of testing code written by Claude Code. If your environment does not support it, do not conclude that frontend verification is impossible. Choose another supported testing path and describe what you actually used.
Claude Code Desktop has a separate preview workflow. Its documentation says it can start a development server, inspect the app in a Browser pane and iterate on issues. The same documentation says SSH sessions do not have that pane's browser tools and cannot auto-verify through it[4].
For a team comparison, record the surface: CLI with Chrome, editor extension, Desktop local session or something else. Two people can both say "Claude Code" while evaluating quite different feedback loops.
React and Next.js changes need an architecture check
A frontend assistant can make the screen work while moving too much code across the client boundary. Next.js documents layouts and pages as Server Components by default. Client Components are for features such as state, event handlers and browser APIs, while server-side work can keep data access and secrets off the client[5].
When an assistant adds a broad `use client` directive to fix a small interaction, inspect the boundary rather than accepting the build as sufficient evidence. The Next.js guide recommends placing that directive on the interactive pieces instead of making a large static subtree client-side[5].
A proposed evaluation task could be a product-list page with a small filter control. Give both assistants the same component tree and ask them to add the interaction without moving secret-bearing data access into browser code. Require an explanation of which files became client components and why.
This is not a test result for either product. It is a correctness criterion supplied by the framework. The assistant's ability to produce attractive JSX does not exempt its changes from that criterion.
Responsive work needs narrow-screen evidence
Do not accept a desktop screenshot as proof that a layout is responsive. The W3C explanation of Reflow describes content that can be presented without losing information or functionality at a width equivalent to 320 CSS pixels, subject to exceptions for content requiring a two-dimensional layout[6].
For a practical comparison, choose a narrow viewport and long content before either assistant edits the component. Add a long title, a translated button label and an empty state. Inspect whether controls remain reachable and whether content is clipped or merely pushed below the fold.
A chart or comparison graphic also needs inspection at the width it will actually occupy. Large source-image dimensions do not guarantee readable labels after the image is scaled into a mobile column. Ask for the rendered pixels, not only the SVG's width and height.
The same acceptance checks apply to both products. If one run captures only desktop and the other captures narrow-screen states, you are comparing review coverage as well as generation. Record that difference instead of burying it in a single subjective design score.
Accessibility is a separate check, not a visual style
The W3C explanation of Focus Visible requires a visible focus indicator for keyboard-operable interfaces[7]. A button that looks correct in a static screenshot can still fail that interaction check.
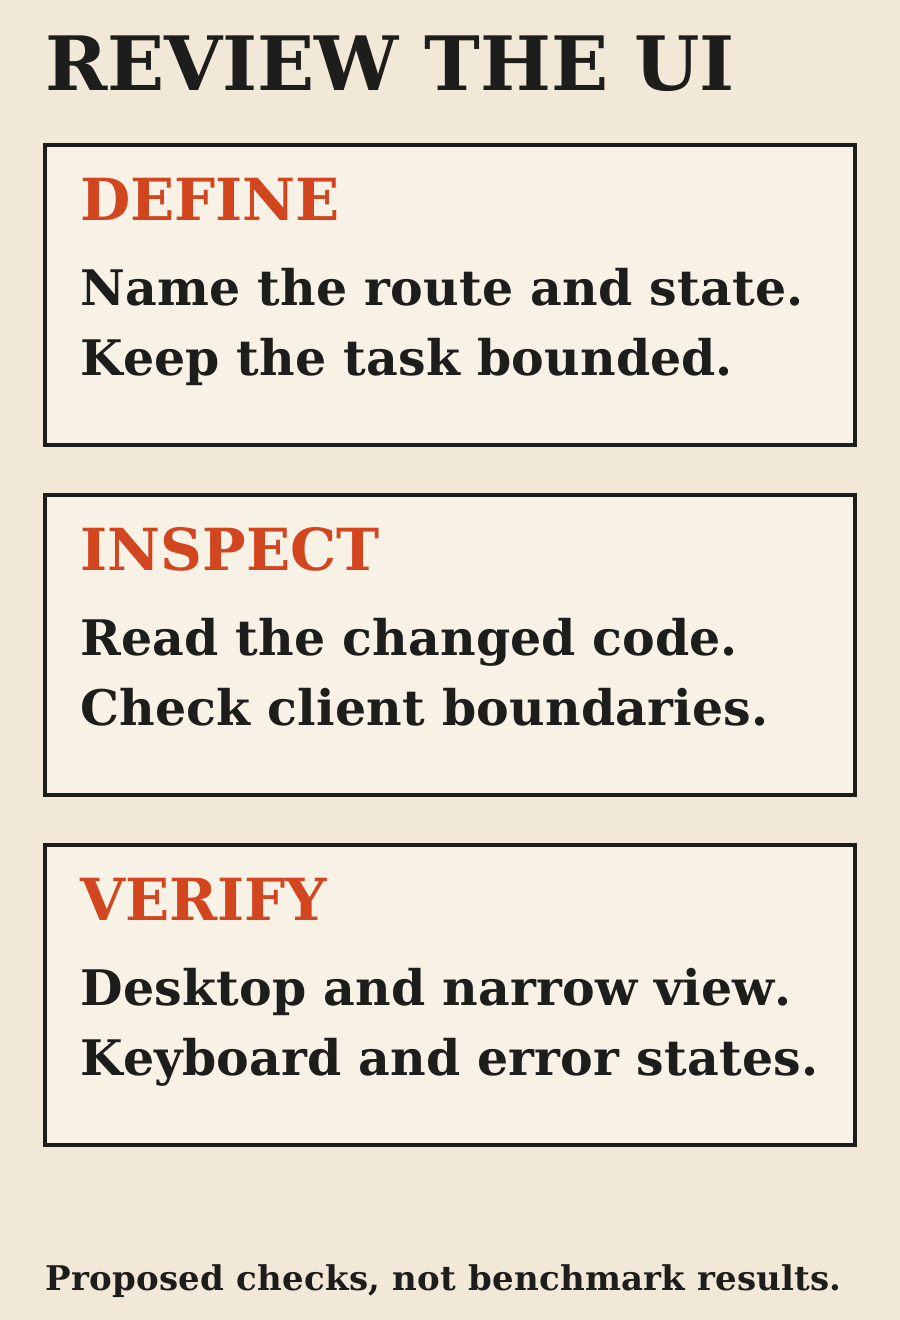
For an evaluation, navigate the changed controls with the keyboard. Check where focus moves when a dialog opens and what happens when it closes. Submit the form with missing data and inspect whether the error is understandable. These are proposed checks; I am not claiming either assistant completed an accessibility audit here.
Do not call an interface compliant because an agent reports no problems. Keep the scope precise: which checks ran, which states were covered and what remains untested. An automated scan, a screenshot review and keyboard testing answer different questions.
Compare a small task before a whole redesign
A fair starting task is one component with a few meaningful states. For example: a settings panel with a default view, a validation error and a pending-save state. Give both assistants the same source, reference image, framework version and acceptance criteria.
I would record:
- Whether the changed behavior matches the requested state.
- How much unrelated code changed.
- Whether the assistant reproduced and fixed console errors.
- Whether desktop, narrow-screen and keyboard checks were actually performed.
- How much human correction and review remained.
If you measure time, include review and repair. A fast first draft that needs extensive cleanup is different from a fast accepted change. If you compare model quality, name the selected models rather than treating the product name as a fixed model.
Avoid a score that hides the important failure. A beautiful form that submits to the wrong endpoint should not win because it earned more visual points. Define disqualifying correctness failures before beginning the trial.
Keep price and data access out of the blind spot
This guide does not estimate the cost of a redesign. Agent sessions vary, and different models or billing routes can change the bill. Use the current product pricing and your actual usage before projecting a team budget.
The Claude Code cost guide explains subscriptions, usage credits and API billing. The data-science comparison includes the current pricing caveat for third-party models in Cursor. Do not copy an older comparison's monthly price into a purchase decision without rechecking it.
Browser access deserves the same care. Claude Code's Chrome guide says it shares the browser's login state[3], while Cursor documents workspace-persistent browser state[2]. For frontend testing, use a staging or local environment and test data where possible. Inspect the target origin before allowing an interaction that could affect real users.
Which tool would I trial first?
For iterative visual changes, I would start with Cursor's Design Mode because its documented interaction directly carries a selected element and screenshot into the request[1]. That is a reason to trial it, not a measured claim that it is faster or more accurate.
For a bounded component or route refactor, I would evaluate Claude Code with an explicit browser verification step using a supported setup[3][4]. I would keep the same framework checks and rendered-state requirements that I would give Cursor.
If your current editor already fits, test whether adding an agent improves one real task before migrating the whole workflow. The better frontend assistant is the one whose changes you can verify and accept with less repair on your project. This article does not establish that winner for you.
FAQ
Is Cursor better than Claude Code for frontend development?
Cursor's visual annotation workflow is a sensible first trial for UI iteration. Claude Code has documented browser workflows too. This guide does not contain a benchmark proving one is better overall.
Can Claude Code see and test a web page?
Yes, through supported browser integrations and Desktop preview workflows. Requirements and limitations depend on the setup, so name the surface used in any test report.
Does Cursor require a separate browser tool installation?
Its current Browser guide says no external tool installation is required for that native integration. Enterprise policy can still govern access.
Is a passing Next.js build enough to accept a frontend change?
No. It does not establish that the correct state was rendered, that mobile content remains readable or that keyboard interaction works.
Should I compare both products using the same model?
If your aim is to isolate the workflow, keep the model and task as comparable as the products allow. Otherwise record the model difference instead of attributing everything to the editor or agent.
Were the products tested for this article?
No. It is a documentation-based guide with a proposed evaluation method, not reported hands-on results.
Sources
- Design Mode - Cursor (opens in a new tab)
- Browser - Cursor (opens in a new tab)
- Use Claude Code with Chrome - Claude Code (opens in a new tab)
- Desktop application - Claude Code (opens in a new tab)
- Server and Client Components - Next.js (opens in a new tab)
- Understanding Reflow - W3C (opens in a new tab)
- Understanding Focus Visible - W3C (opens in a new tab)
Elsewhere on this site
For a different workflow, read Claude Code vs Cursor for data science. For billing, use the Claude Code cost guide.